NTP时间服务器的搭建与应用基础详解 1567次阅读 Centos • 学习归纳 2021-08-15 ## 壹:前言 ------ #### **①百度百科:什么是NTP协议?** 网络时间协议NTP(Network Time Protocol)是用于互联网中时间同步的标准互联网协议。NTP的用途是把计算机的时间同步到某些时间标准。 实际上就是一个可以搭建在服务器上的协议,我们可以通过这个服务器协议,使网络中支持ntp时间协议的设备,时间同步。 #### **②时间对于设备很重要吗?** 是的。比如文件名的电子签名、网页的加密证书、二进制文件的时间戳,基本上你能看见的所有东西,都需要时间。 #### **③为什么需要NTP服务器?** 对于个人设备来说,感知不太强,因为Windows系统有默认的ntp校准服务,且各设备协同工作需求不高。 但是!想象一下,假如在一家大型企业里,各种设备的时间不同步,各自为营。 情况一:发生了治安案件,需要调取监控,但这时你惊奇地发现,每个监控显示的时间都不一致,时间轴不一样,就没办法准确还原哪段时间发生了什么。 情况二:公司文件按创建时间归档,而每台工作设备的时间不在一个基准,创建出来的文件自然也是乱套的。 而这个时候,就非常需要一台可以统一每台设备的时间的服务器--NTP服务器。 #### **④关于NTP服务器的一些简要知识** 要对NTP服务器进行配置,首先要了解以下4个文件或目录的作用。 - /etc/ntp.conf文件:主配置文件 - /usr/share/zoneinfo目录:在该目录中包含各主要时区的时间设定文件。 - /etc/sysconfig/clock文件:主要时区设置文件,保存系统的当前时区。 - /etc/localtime文件:本地时间设置文件。该文件的内容由/etc/sysconfig/clock文件中的时间决定,具体值与/usr/share/zoneinfo目录中的某一个文件相同。 - 当配置客户端连接NTP服务器时,只需要修改主配置文件即可。 ------ ## 贰:准备NTP服务 ------ ```centos [root@centos /]# yum install -y ntp ``` 使用yum源安装ntp服务 ```centos [root@centos /]# cd /etc [root@centos etc]# cp -p ntp.conf ntp.conf.bak ``` 进入/etc目录,备份ntp.conf文件 ------ ## 叁:修改/etc/ntp.conf文件 ------ ```centos [root@centos etc]# vim /etc/ntp.conf ``` 使用文本编辑器编辑/etc/ntp.conf主配置文件 ```centos restrict default ignore //关闭所有的NTP联机服务。 restrict 192.168.31.0 mask 255.255.255.0 nomodify //设置在内部网络192.168.31.0中各客户端可进行网络校时,但不能修改NTP服务器的时间参数。 server time-b.timefreq.bldrdoc.gov server time-c.timefreq.bldrdoc.gov server s1b.time.edu.cn //设置了三个上级NTP服务器 server 127.0.0.1 fudge 127.0.0.1 stratum 10 //上面两句开启了内部递归网络接口。 driftfile /var/lib/ntp/drift //定义保存与上级NTP服务器联系时所花费时间的文件名。 ``` 确保主配置文件内有以上语句,有相似的就修改,没有就加上去。 下面是按我的实例做的步骤,可参考: ①  ②  将restrict default nomodify notrap nopeer noquery改为restrict default ignore 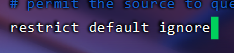 ③添加restrict 192.168.31.0 mask 255.255.255.0 nomodify  ④添加上级NTP服务器,并开启内部递归网络接口(lookback) 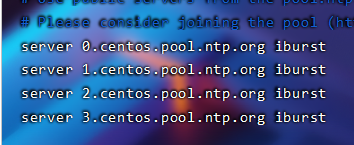 将此四条默认服务器信息删除,将新的服务器信息和内部环回接口信息填入 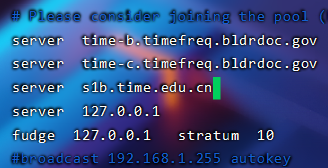 下面是修改完成的/etc/ntp.conf模板 ```centos # For more information about this file, see the man pages # ntp.conf(5), ntp_acc(5), ntp_auth(5), ntp_clock(5), ntp_misc(5), ntp_mon(5). driftfile /var/lib/ntp/drift # Permit time synchronization with our time source, but do not # permit the source to query or modify the service on this system. restrict default ignore restrict 192.168.31.0 mask 255.255.255.0 nomodify # Permit all access over the loopback interface. This could # be tightened as well, but to do so would effect some of # the administrative functions. restrict 127.0.0.1 restrict ::1 # Hosts on local network are less restricted. #restrict 192.168.1.0 mask 255.255.255.0 nomodify notrap # Use public servers from the pool.ntp.org project. # Please consider joining the pool (http://www.pool.ntp.org/join.html). server time-b.timefreq.bldrdoc.gov server time-c.timefreq.bldrdoc.gov server s1b.time.edu.cn server 127.0.0.1 fudge 127.0.0.1 stratum 10 #broadcast 192.168.1.255 autokey # broadcast server #broadcastclient # broadcast client #broadcast 224.0.1.1 autokey # multicast server #multicastclient 224.0.1.1 # multicast client #manycastserver 239.255.254.254 # manycast server #manycastclient 239.255.254.254 autokey # manycast client # Enable public key cryptography. #crypto includefile /etc/ntp/crypto/pw # Key file containing the keys and key identifiers used when operating # with symmetric key cryptography. keys /etc/ntp/keys # Specify the key identifiers which are trusted. #trustedkey 4 8 42 # Specify the key identifier to use with the ntpdc utility. #requestkey 8 # Specify the key identifier to use with the ntpq utility. #controlkey 8 # Enable writing of statistics records. #statistics clockstats cryptostats loopstats peerstats # Disable the monitoring facility to prevent amplification attacks using ntpdc # monlist command when default restrict does not include the noquery flag. See # CVE-2013-5211 for more details. # Note: Monitoring will not be disabled with the limited restriction flag. disable monitor ``` ------ ## 肆:修改/etc/ntp/step-tickers文件 ------ ``` [root@centos etc]# vim /etc/ntp/step-tickers ``` 使用vim文本编辑器编辑/etc/ntp/step-tickers文件 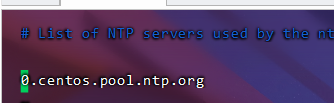 将默认的服务器信息删除,修改为本机的IP地址 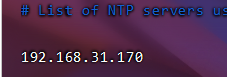 保存退出 ------ ## 伍:配置NTP服务器 ------ ```centos [root@centos etc]# systemctl restart ntpd [root@centos etc]# systemctl enable ntpd Created symlink from /etc/systemd/system/multi-user.target.wants/ntpd.service to /usr/lib/systemd/system/ntpd.service. ``` 重启ntp服务,创建开机启动 ```centos [root@centos etc]# ntpq -p ``` 使用ntpq -p命令监控ntp服务器 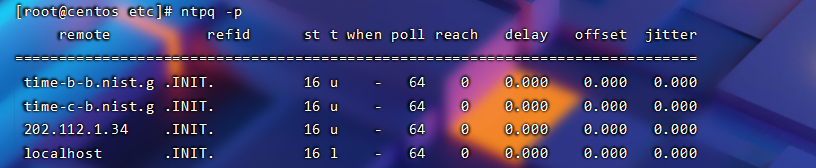 > 大致解析: > > remote*:响应这个请求的*NTP服务器的名称。 > > refid:NTP服务器使用的上一级*ntp*服务器。 > > st:*remote*远程服务器的级别*.* 由于*NTP*是层型结构*,*有顶端的服务器*,*多层的*Relay Server*再到客户端*.*所以服务器从高到低级别可以设定为*1-16.* 为了减缓负荷和网络堵塞*,*原则上应该避免直接连接到级别为*1*的服务器的*.* > > when:上一次成功请求之后到现在的秒数。 > > poll : 本地机和远程服务器多少时间进行一次同步*(*单位为秒*).* 在一开始运行*NTP*的时候这个*poll*值会比较小*,*那样和服务器同步的频率也就增加了*,*可以尽快调整到正确的时间范围,之后*poll*值会逐渐增大*,*同步的频率也就会相应减小 > > reach: 这是一个八进制值*,*用来测试能否和服务器连接*.*每成功连接一次它的值就会增加 > > delay: 从本地机发送同步要求到ntp服务器的round trip time > > offset:主机通过*NTP*时钟同步与所同步时间源的时间偏移量,单位为毫秒(ms)。offset越接近于0,主机和ntp服务器的时间越接近 > > jitter: 这是一个用来做统计的值*.* 它统计了在特定个连续的连接数里*offset*的分布情况*.* 简单地说这个数值的绝对值越小,主机的时间就越精确 ------ ## 陆:验证 ------ 为了方便验证,我们提前把linux和Windows的时间调前一天。 下面开始验证 #### Linux: 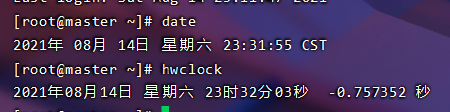 ``` [root@master ~]# date -s 08/13/2021 //写入指定日期到系统 2021年 08月 13日 星期五 00:00:00 CST [root@master ~]# hwclock //查询硬件时间 2021年08月14日 星期六 23时34分19秒 -0.447112 秒 [root@master ~]# clock -w //写入时间到bios [root@master ~]# hwclock //查询硬件时间 2021年08月13日 星期五 00时00分39秒 -0.272681 秒 ``` 可以看到,我们已经把时间改到了8月13号 ##### 方式① ```centos [root@master ~]# yum install -y ntp ``` 首先用命令安装NTP服务 ```centos [root@master ~]# vim /etc/ntp.conf ``` 使用文本编辑器修改ntp服务的主配置文件 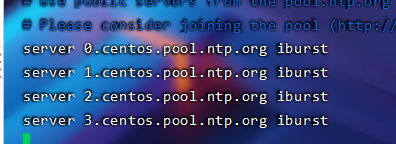 将默认的上级NTP服务器删除 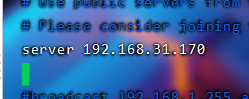 修改为刚才创建的NTP服务器的IP地址 ```centos [root@master ~]# systemctl restart ntpd[root@master ~]# systemctl enable ntpdCreated symlink from /etc/systemd/system/multi-user.target.wants/ntpd.service to /usr/lib/systemd/system/ntpd.service. ``` 重启和设置开机启动服务 此时ntp会以守护进程的方式去运行,且会自动同配置文件中的NTP服务器同步时间,不需人工干预。 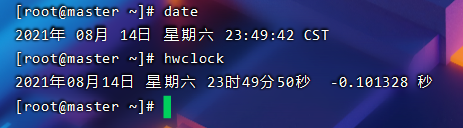 再次通过命令检查系统时间和硬件时间,发现已经恢复了8月24号,测试成功! ##### 方式② ```centos [root@master ~]# yum install -y ntpdate ``` 通过命令安装ntpdate服务 ```cnetos [root@master ~]# crontab -ecrontab: installing new crontab ``` 通过命令打开创建定时任务的文件  填入如下命令,ip地址按实际修改,在每天的0点56分、8点56分、16点56分与时间同步服务器进行同步并写入BIOS  可以看到,时间已经变为8月14号,测试成功! ##### Windows: 控制面板--日期和时间--更改日期和时间--internet时间--更改设置--暂时取消勾选与Internet时间服务器同步 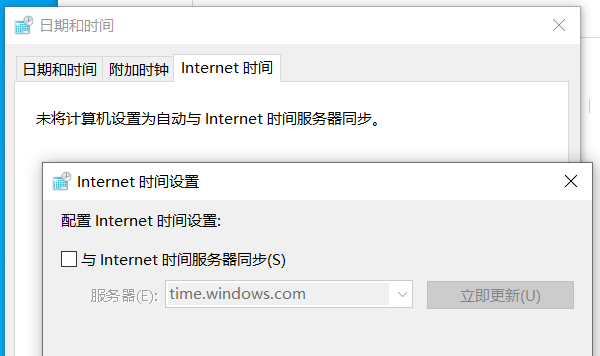 确定,回到日期和时间界面  点击更改日期和时间,将时间回到13号  可以看到,时间已成功倒回13号 这时,我们回到Internet时间设置,勾选与Internet时间服务器同步,并将服务器设为我们的NTP服务器的IP 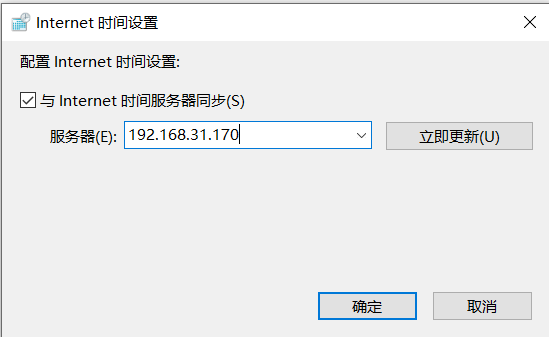 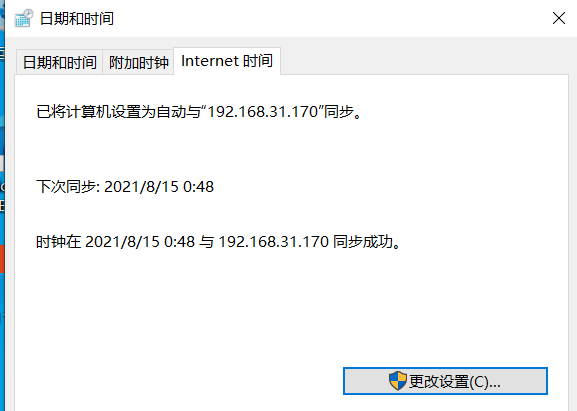 更新一次,这时候,我们再来查看系统时间  可以看到,已经自动调整为正确的时间,测试成功! ------ 谢文伟 写于2021-08-15 最后一次更新于2021-08-15 centos NTP 时间 服务器


0 条评论